Tomorrow the new form of the personal data protection law, otherwise known as GDPR, comes into effect. Under this regulation a number of changes have to be made to websites. One important change is configuring things so that the tracking tags collecting data about cookies for the purpose of personalising ads in users' browsers only fire once the user has given consent on the website.
For managing tracking tags easily I recommend using a tool called Google Tag Manager (GTM). I have already written several articles about this free and effective tool. If you are only starting out with it, I recommend reading those first: An introduction to Google Tag Manager, An introduction to Google Tag Manager II
So that you can control which tracking tags load only after the user has actively consented, we have prepared a Google Tag Manager export for you, which you can import very quickly and easily. Let us go over what this export should contain and how to adjust it so that everything works as it should on your website too.
The export contains:
- cHTML - Write cookie. This tag creates a cookie in the user's browser. The cookies set here are deleted after 30 days. You can easily adjust the file's lifetime in the tag and set a longer period. We do that by changing the expiry value in seconds on line 4. Thanks to the cookie, when the user returns to the site the tracking tags they already consented to on their previous visit can fire automatically.
- cHTML - Popup. Here is an example of what a pop-up window announcing and requesting consent to the processing of personal data during browsing might look like. You can remove this tag if you already have a notice implemented on the site. Several changes can be made in the tag, which we will go through below.
- AW remarketing - Example. Here we find an example of a tag that will fire only for users who have given consent.
Triggers
- Click – Cookie – Accept. This trigger is set to the consent click in the pop-up window. If you use a different notice, this trigger has to be changed. The exact configuration will always differ depending on the type of site
- DOM – With cookie. Fires tags in cases where the user has expressed consent to data processing on the website and has the cookie written.
Variable
- Cookie. Identifies whether or not consent to the processing of personal data was granted and the cookie subsequently stored in the user's browser.
Importing the export into GTM
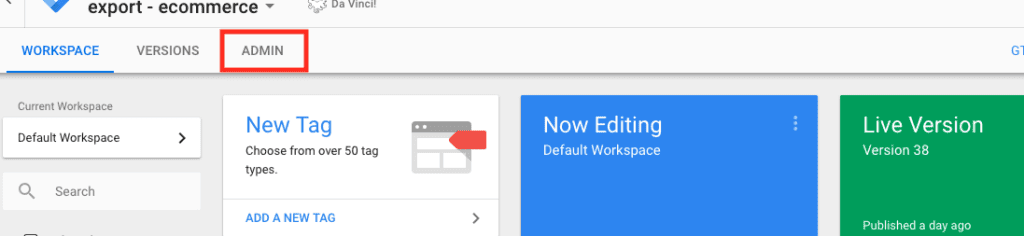
We import the export by choosing Admin in the top tab of GTM, then Import Container, and uploading the downloaded export there. The export can be downloaded HERE. I recommend merging this export into your GTM rather than overwriting, so that we do not lose all the tags already configured.


Once the settings are imported, the appearance of the pop-up window has to be adjusted. We can generate our own pop-up by opening the button below, where we can choose the colours, the text and the page holding our personal data policy. It is important to keep the link tags (<a> </a>) in the text.
If you already use another solution you can remove this tag, but the trigger named "Click – Cookie – Accept" has to be adjusted so that it is set to the consent click on your current notice.
This tag is for illustration only; if you want it to work as it should, the variables within the tag's configuration have to be adjusted. It is attached to a trigger that will fire the tag only once consent has been given and for the lifetime of the cookie. If you already have such code configured in your GTM, I recommend removing it and simply adjusting the trigger on the original code.
Every other tag and tracking code requiring active consent has to be attached to the "DOM – With cookie" trigger, which will switch these tags on only for a visitor who has given consent. It is essentially the same as the "AW remarketing – Example" tag, which serves as the example.
This is how we can configure retargeting tags, for instance, or a Google Analytics property with remarketing enabled. You can read more about this setting and how to check it on the Google support pages. We recommend turning this setting off on the property currently in use. If you do not want to lose those options, create a new Google Analytics property where the setting is enabled, but fire that property's tag only for users who have consented.
And there we have it. We have shown everything needed to create and read cookies with Google Tag Manager, and how to fire tags on the basis of them.
In closing I would like to thank Julius Fed for the blog post from which I used part of the HTML code. My thanks also go to the developers who helped me adjust the scripts and build the custom HTML for the pop-up, and to Jakub Gombár, who designed this whole solution.