Tag elements & GTM
Working with tags and managing them is very simple. Before you start, though, take a look at the basics you ought to know about.
Container
When you begin working with GTM, the first thing you have to create is a container, which holds all your tags. Once the container is created, GTM gives you code that you have to add to the source code of your site (it must be implemented on every page and subpage of your site). Some applications such as CMSs or WordPress have plugins that will help you add the code. As soon as that code is in place, you will be able to add and manage tags through GTM as needed.
Triggers
Every tag on the site has to serve a specific purpose. You may want a tag to send information when somebody downloads a file or submits a form. These events are triggers, and every tag must have at least one, or nothing will happen.
Triggers can be split into two main parts: events and filters. Once you go through the whole GTM configuration setup, you get a long list of trigger types to choose from as you see fit. These are the events that happen on the page. Having chosen an event, you will then be able to set a filter.
Filters can be split into three parts: variables, operators and values. We will talk about variables in more detail a few lines further down, but in this case what is meant is the type of variable. The operator tells the tag whether the event has to be equal to something (or whether it should be greater or less than a certain value, contain a certain value, and so on). The value is, of course, the condition that has to be met. Although the word "value" is usually used in relation to numbers and prices, in this case it need not be. In many cases your value will be something like a URL or a keyword.
An example
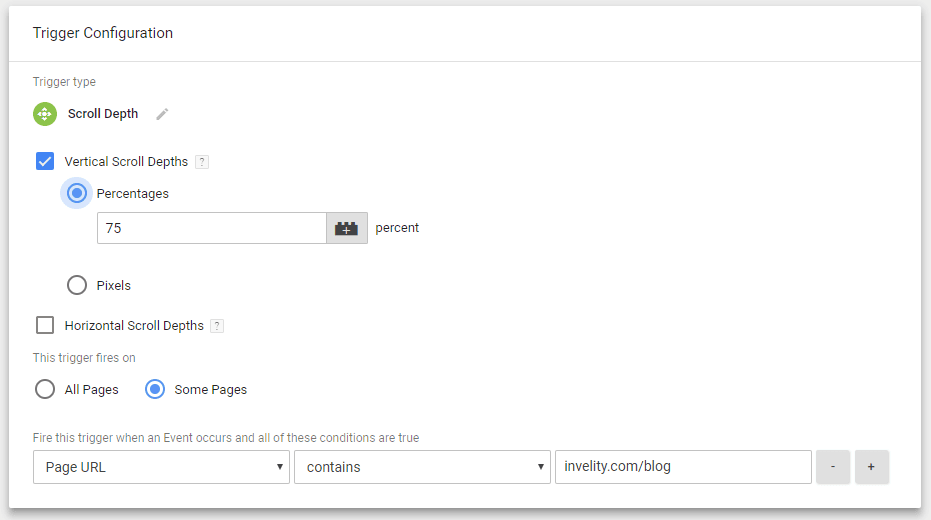
Say you wanted to find out how many people read the blog content. You could create a tag with a Scroll Depth trigger event that should fire whenever a reader scrolls 75% of the way through the post. If you wanted that to happen on every one of your pages, you could leave the trigger as "All Pages". Since you are focusing on blog content, though, you would choose the "Some Pages" filter and build a filter reading "Page URL" "contains" "invelity.com/blog".
Variables & constants
Just as tags depend on triggers, triggers depend on various variables. A variable holds the value that the trigger has to evaluate to decide whether or not it should fire. The tag compares the variable's value against the value defined in the trigger, and if the variable meets the trigger's conditions, the tag fires.
Tags also use variables to gather information that can be passed into the data layer when a user interacts with the site — setting a tag to fire, for example, whenever a person adds a certain quantity of products to their shopping cart.
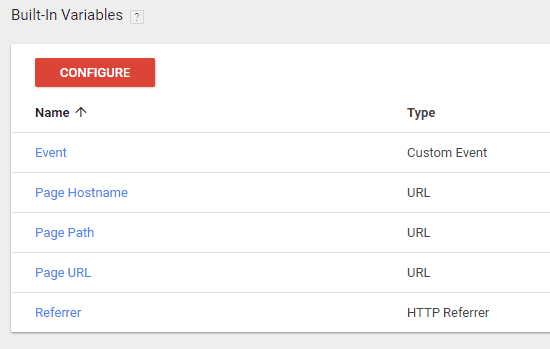
Working with GTM you will deal with two different kinds of variables: built-in and user-defined (custom) variables. The built-in ones are some of the most commonly used variable types, provided by Google.
Working with GTM
Creating an account and a container
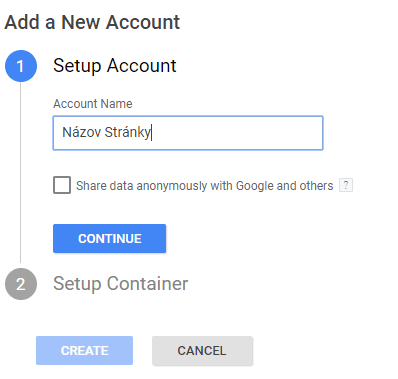
To get started you have to go to tagmanager.google.com and create an account. Under "Account Setup" enter the name of the company whose site is being managed and press "Continue".
Then you set up the container. Enter the domain name as the container name, choose the type of site or app it will be used on, and click "Create".
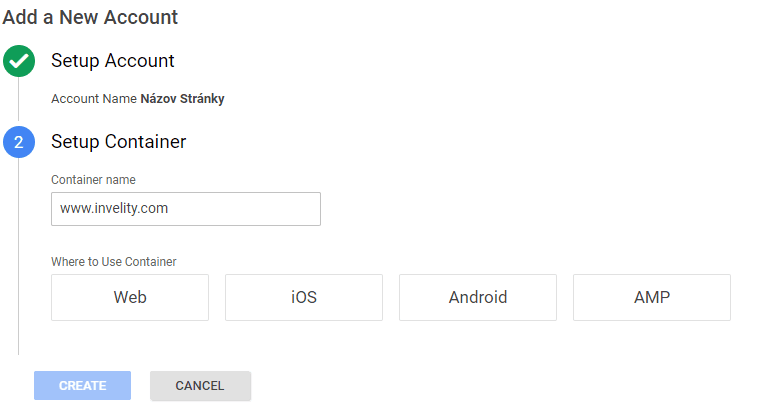
It is recommended that you use the company name as the account name and the domain as the container name. Once your container is created, accept the GTM terms of use and the container code will be generated for you.
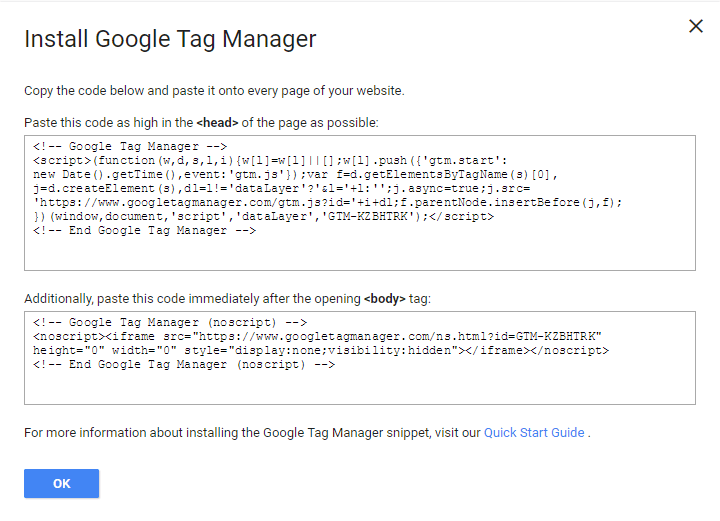
Once you add this code to the site you will be able to create tags. Before you start, it is worth working out which tags you want to add. Although there are no limits on the number of tags in an account, I would recommend keeping the number you use to a minimum.
Creating a tag
Once you create or select a container, the first thing you will see is the GTM dashboard. You begin by creating a tag. Clicking "Add a new tag" opens a window where you can name and configure the tag.
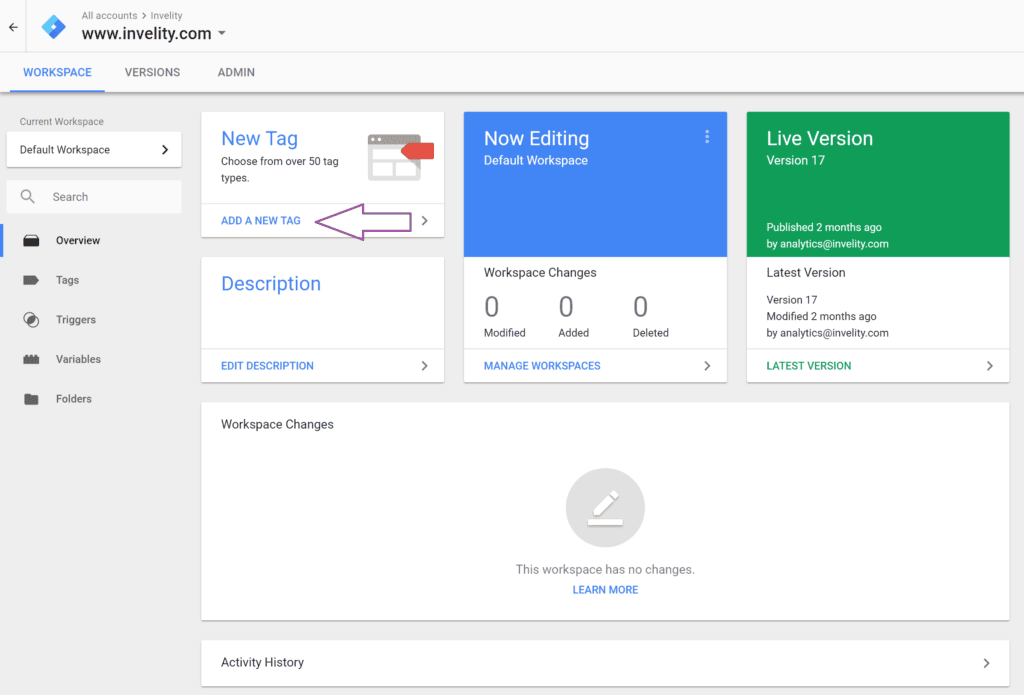
Before you carry on creating tags, do remember to give them very clear names, so there is never any confusion about which tag does what. I recommend naming tags like this: Tag type – Detail. For example, a Google Analytics tag tracking a form submission on the site would look like this: GA – Form send. For AdWords it would be: AW – Form send.
Putting the type at the start of the name helps keep tags organised. GTM lists tags alphabetically, so if you create several tags for the same service, they will all sit together.
Now back to creating the tag. After clicking Add a new tag on the dashboard, the window you can see appears. Choose "Tag Configuration" and you get a long list of templates covering the most common cases. If the type of tag you want to create is not shown, choose "Custom HTML" and add your own code.
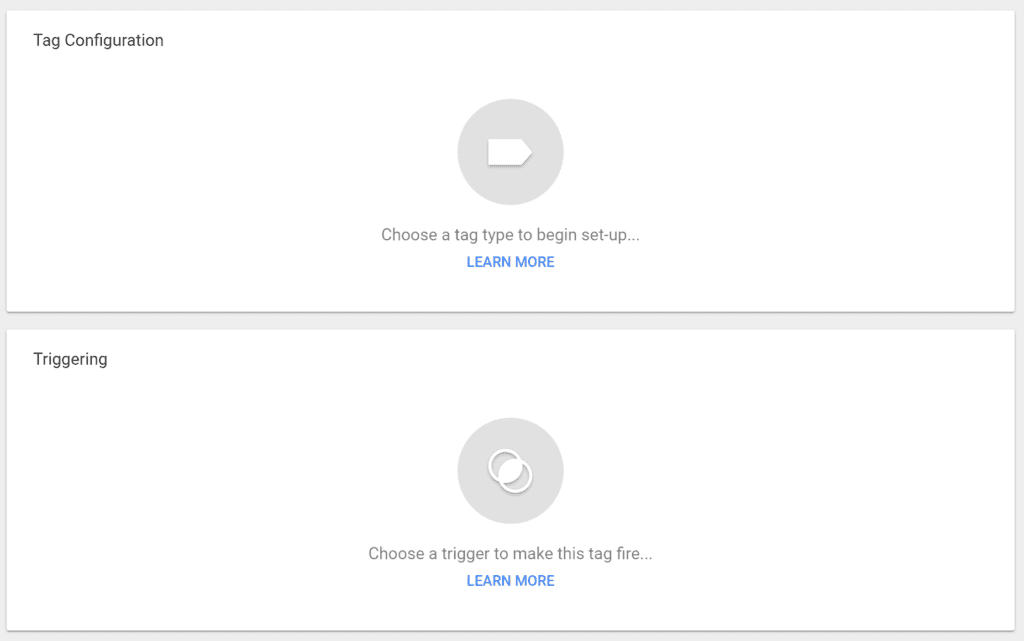
Exactly what information you have to supply will differ depending on the type of tag you are working with. Say I want a Google Analytics tag for whenever someone views our contact page. Having chosen Universal Analytics, this is what you will see.
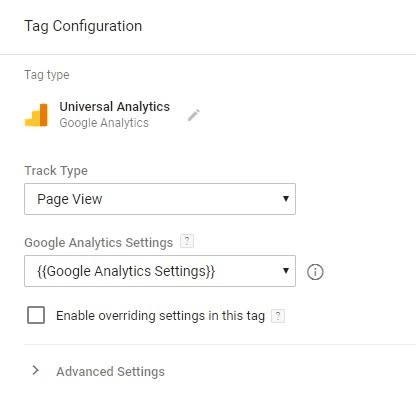
All you have to do is choose "Page View" from the "Track Type" dropdown and then enter the variable holding your Google Analytics account details. If you have not defined that variable beforehand, you can click the "Google Analytics Settings" dropdown and choose "New Variable".
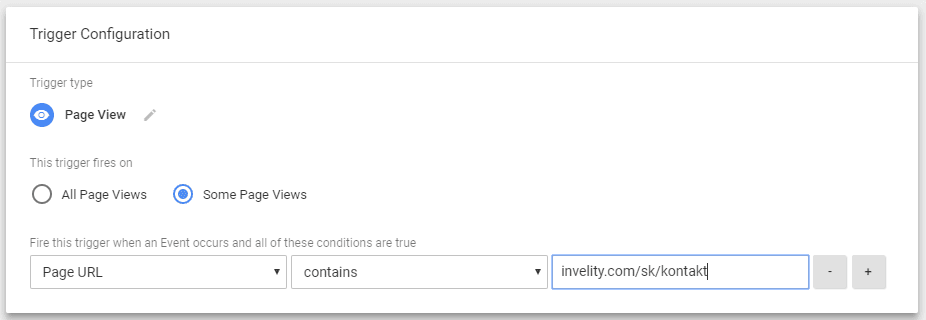
Next you will have to create at least one trigger. To get started, click the "Triggering" field under "Tag Configuration". If the list that opens has no trigger you have created, click the + sign in the top right corner. That opens a new window where you have to enter a name for the new trigger. In my case it will be "Page View", since I want my tag to fire on one page only. I chose "Some Page Views" and then create a filter stating which URL it should fire on.
Preview, debugging and publishing
GTM's "Preview" mode lets you test tags before publishing them, so you can be sure everything works properly and you will have no errors.
To get into that mode we click the "Preview" button in the top right corner of GTM, and we see an orange banner warning us that we are in preview mode. We open the site we were configuring GTM for in a new tab, and at the bottom of the screen you should see the Debug panel. No need to worry — only you can see that panel, your customers will not.
The Debug panel shows us all the information we need about tags, triggers and the data layer. On the left is a summary of the event timeline recording everything that happened. At the very least you should see at least three events — Page View, DOM Ready and Window Loaded. It is fine to see more than three, but if one of those three is missing, that is a problem that has to be fixed. To leave preview mode we click "Leave Preview Mode" on the main GTM page, which sits below the orange banner.
Once it turns out that every tag on your site works properly, you can go ahead and publish them. On the GTM dashboard press the "Submit" button in the top right corner and a prompt to review the changes appears. If everything is in order, we publish it by pressing the "Publish" button in the top right corner.
Further reading
Google Tag Manager has a great deal to offer. This basic guide should help introduce you to it. Naturally there is still plenty more to learn about GTM in order to use its full potential. I recommend the blog by Simo Ahava on using its various features. Google Tag Manager has many good things that lend themselves to good use. With everything GTM puts at your disposal, you should have all the information you need to find out what people do on your site and then put it to work on better optimising your online marketing mix.