Did you know that on Facebook only 4.32% of the people who are fans of your page see your content? Besides that, only 15% of published posts are shown to other people.
Did you know that on Facebook only 4.32% of the people who are fans of your page see your content? Besides that, only 15% of published posts are shown to other people. Interaction with posts is also very low - only 1.52% of fans react to or engage with posts. Creating content and relying only on organic reach does not pay off in this case. Get the most out of your work and use boosting.
Boosting — supporting posts — will help you bring content to the right target group and support your communication's goal. In this blog post we will show how to start creating boosting campaigns in practice.
To begin with you will need Facebook Business Manager (FB BM). With its help you can target your prospective customers more precisely, work with audiences and evaluate results. It will also open up more boosting goal options. Do not worry, take a look at our guide to how to create a Facebook Business Manager.
A post can be boosted on Facebook through the Boost Post button or through Business Manager. We recommend always boosting a post through BM.
Boost Post is the traditional way, which is simple but not entirely effective. You cannot set an audience there and you spend money without much effect. BM is a far better choice in the long run. It offers a wider range of options, which lets you achieve better results.
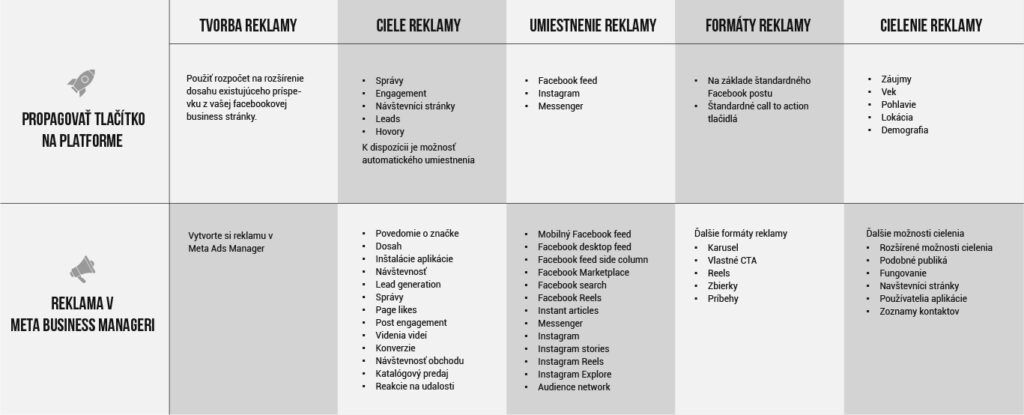
The difference between boosting through the boost button vs. through Facebook Business Manager:
If you already have an account in FB Business Manager, ignore this point and go straight on to the next.
How to go about boosting - let us start nicely from the beginning
You can click through to the FB BM account where we will do the boosting from your META profile. All you have to do is click the Help button in the bottom left corner - Go To Business Manager.
Next click through to the Ads Manager section. That is where all the magic of setting up your boosting will happen.
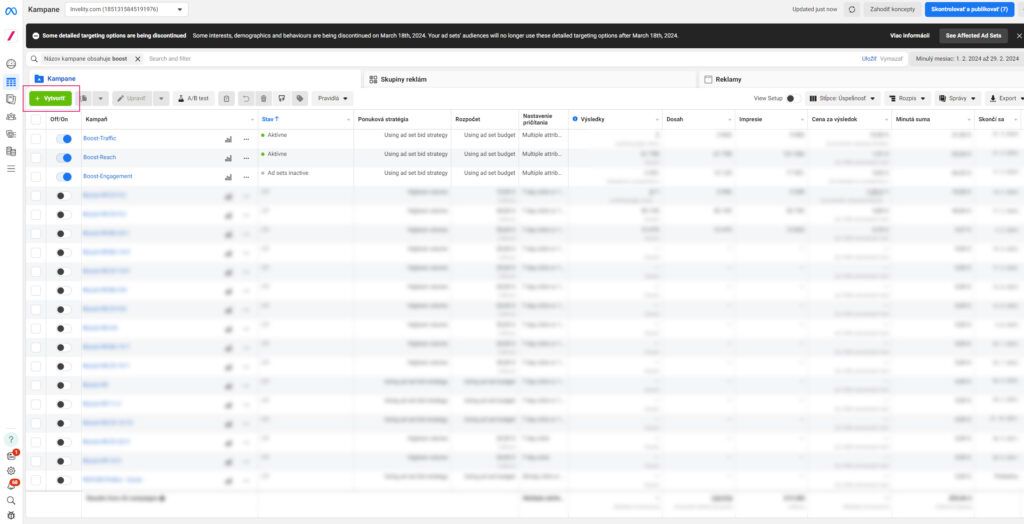
The advertising interface will open. Of course, if you are only starting with boosting, you will not yet have campaigns created there like ours. With the green Create button we will start creating them.
Choose your boosting goal
Depending on the overall goal you want to achieve with your social media communication, you can choose your boost's goal too. This goal is chosen right after clicking the Create new campaign button.
With boosting I most often choose these goals:
We choose the boosting goal according to what we want to achieve with the given post.
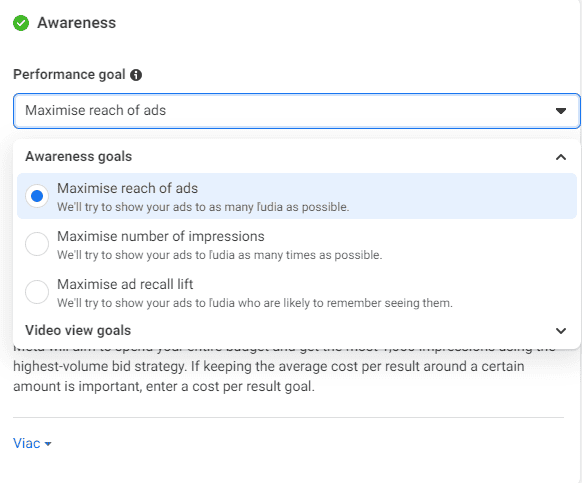
Example 1: I want to spread awareness of a product from my e-shop. In that case I choose a combination of goals - Reach/Brand Awareness and Traffic. Besides spreading distribution of information about the product with a reach-focused campaign, I want people to click through to the site and so have the chance to buy the product.
Example 2: I want to increase people's engagement with the content I publish on social media. In this case I will choose a combination of the Engagement and Reach/Brand Awareness goals. With the help of an interaction-focused campaign my content will be shown to people with the potential to interact. With the reach-focused goal I will spread the post's distribution.
I recommend creating a campaign for all 3 goals and gradually adding posts to it as you need to combine these goals.
Setting up the campaign
We will create a sample campaign with the goal Awareness or Brand Awareness. After clicking the Create button we choose the campaign objective - Awareness and then click Continue.
Choose the campaign's name according to its goal. What matters is that the name is recognisable to you.
If your business concerns one of the special ad categories, you need to tick that specification under Special ad category.
Typically these are brands whose business deals with:
credit and loans
employment or job offers
housing or housing finance
political topics
If none of the topics listed is what your business does, you can skip this point and continue with the other settings.
We leave the campaign details as Auction.
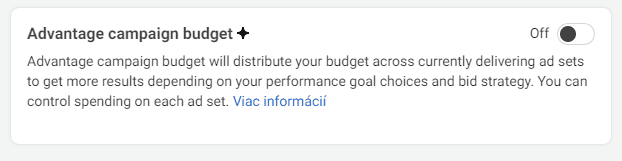
As the next step we set, or rather do not set, the campaign budget. ? I recommend switching off the Advantage campaign budget. For each particular ad set we will set the budget for the particular post boost in the next steps. We click Next in the bottom right corner.
Setting up the ad set
In this step we get to setting up the ad set. We start with a suitable name. Keep a consistent naming structure - it will be simpler for you to find your way among the individual boosted posts.
Recommended structure: /date - post targeting - a keyword by which you recognise the post/
Check the boosting goal.
Set the budget and duration of the post boost. When splitting the budget I recommend choosing the total budget for the boost launched. That way you will be sure that at most the amount you set will be spent. As for the boost's duration, go by the budget you have chosen. When you boost a post with €10 I recommend running it for 2-3 days at most.
Next you need to choose all the demographic data about your target group, or pick from the audiences you have created. Read what audiences are and what they are for.
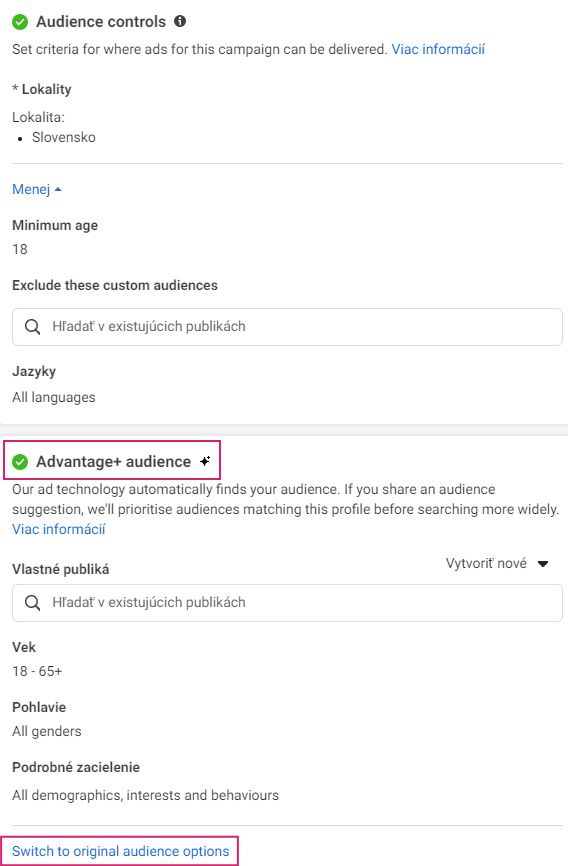
When targeting broadly you can use the Advantage+ targeting option - targeting automation from Facebook. It uses artificial intelligence so that the audience finds a suitable target group. With this audience it is possible to adjust the audience using set criteria such as age, demographics and interest targeting.
But of course you can choose manual targeting settings by clicking the button below - Switch to original audience options.
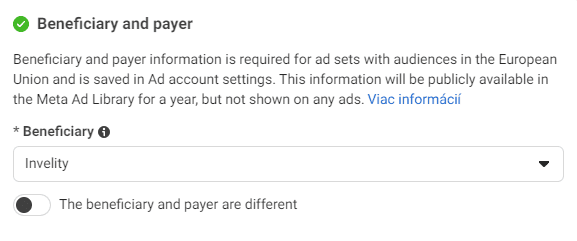
Check that you have the right account ticked, the one you are boosting the post for.
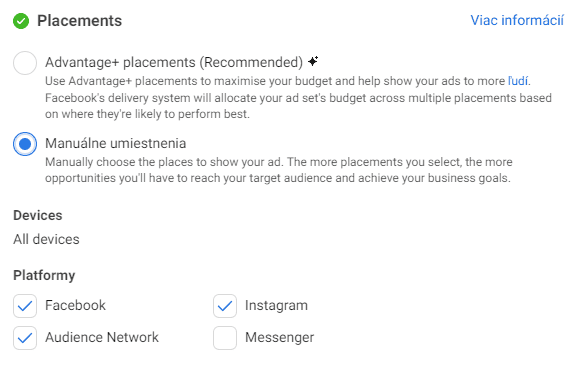
In the next step we set the placements where your boosted post will show. It is possible to choose automatic Advantage+ placements or manual placement.
Personally I prefer choosing manual placement, because when you boost some post format, a static square post for instance, it is not suitable to show it in the Reels placement. In the next step of the ad you will see how your post will show in the placement previews - choose those where your post format looks good, is legible and comprehensible to the target user. Do not be afraid to choose several placements.
When choosing the platform, choose the one where the post is published - with a Facebook post we choose Facebook placements.
The ad set is set up; click next in the bottom right corner.
Setting up the ad
At ad level we set up the particular post we want to boost.
In this step it does not matter so much which ad name you choose, since we named the ad set conscientiously. As the name you can choose the post's publication date. Check that you have the right page chosen for boosting the post.
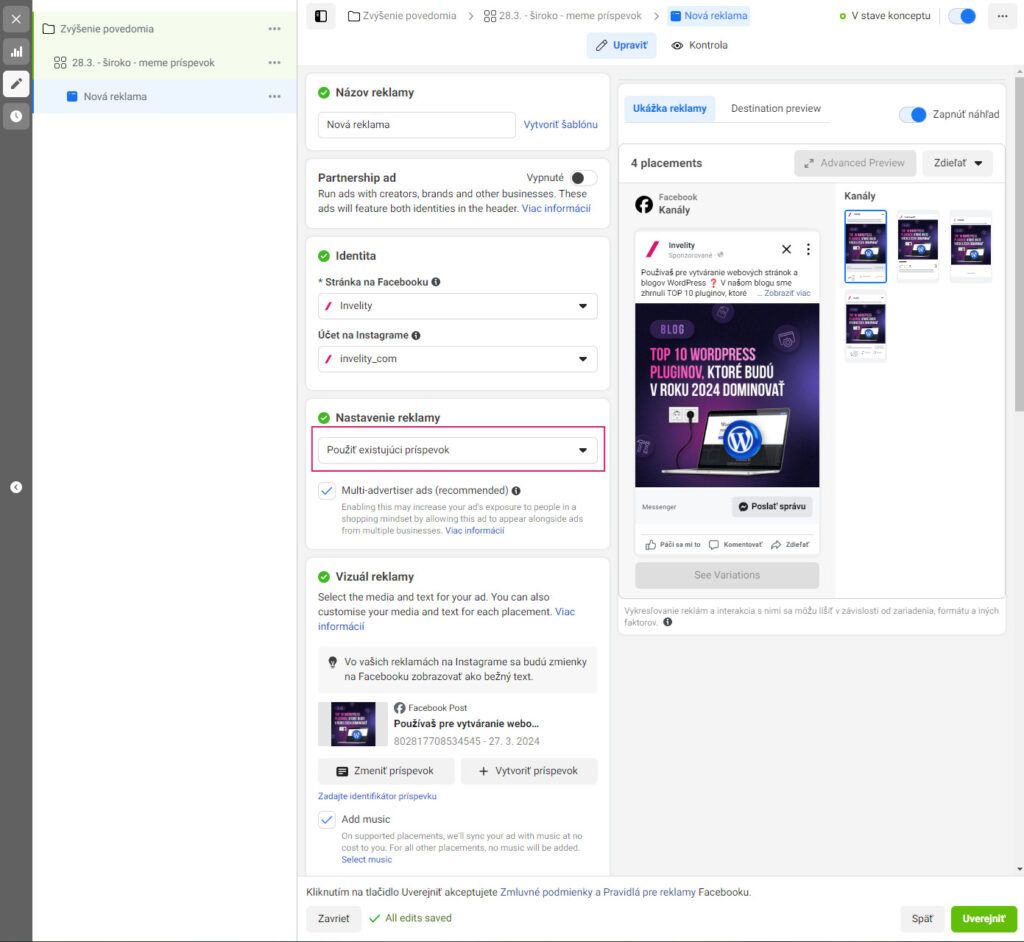
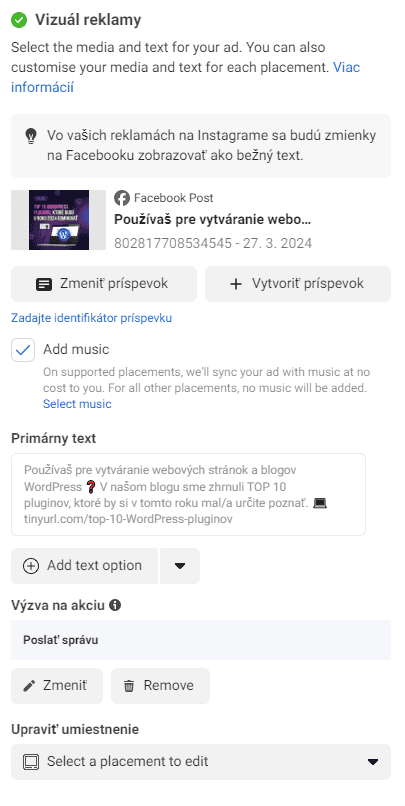
When setting up the ad choose the option - Use existing post. That is because we want to boost the success of that one already published creative. In the next step we choose the post we want to boost.
By clicking Add post/Change post you choose the post you want to boost. On the right side previews of the post will appear in the placements chosen at ad set level. Check them all to see whether they display as you imagine, and if not, go back a step and adjust the placements chosen.
If you leave the Add music option ticked, the system will assign music to the post itself. I recommend testing it.
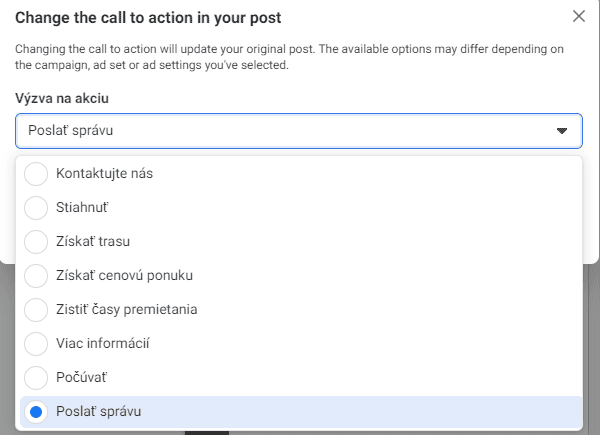
At ad level you have the option of changing the call under the post - the Call To Action button under the post that prompts people to take an action with your post. I recommend choosing according to the goal - when you publish a blog post and want to get more click-throughs, use Learn more. When conversely you want people to send you an enquiry, choose Send message.
If you use traffic tracking on your site, tick the Website events and Offline events options.
If everything is in order and you have checked all the settings, you can click the Publish button in the bottom right corner.
We have now gone through boosting a post with the reach goal; if you want to boost a post with a different goal too, follow the same steps, only choose a different goal when creating the campaign.
How to proceed with further boosts?
Once you have campaigns created for all three of the most used goals, at least one boost running in each, and want to boost another post, you can duplicate the settings.
Open the campaign with the goal you want to boost the next post with and, at ad set level, select your previous boost and click Duplicate.
That way all the settings you chose for the previous post boost will be duplicated.
How to evaluate post boosting?
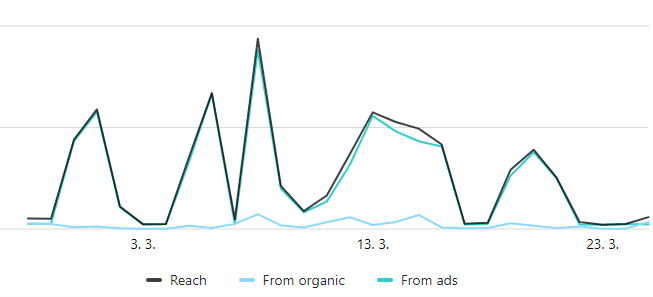
When evaluating we always go account by account. Nowhere is it written what values are a good or a bad result. That is why you have to track how your posts, chosen audiences, placements and posts are doing. Statistics can, however, bring considerable order to individual posts' performance. In the META Business Suite tool you will see nice overviews and charts showing how posts did compared with the previous period.
In Facebook Business Manager you can look at it in more detail for each boosted post. All you have to do is select the campaigns you want to take into account and go to ad set level. Systematically and clearly named boosts will help you identify a post's boost at once, thanks to which you will be able to sort the results better. On the right of FB BM's top bar you can sort your result columns by the metric you want to evaluate.
So how about it? Are you going for it? Let us know how you get on with boosting and send any questions to blistanova@invelity.com.
Recommended reading
The latest trends, proven practices and analyses from the digital world. Find out how to take your technology and marketing growth further.