
Valéria Lapínová
PPC & SEO specialist
Do you own an e-shop and would you like to reach more customers through Google? In that case you need to create a Google Merchant Center account. We have prepared a simple guide for you on how to create it and how to grant access to your agency or anyone else you want.
1. The first step is to go to the page for creating a Google Merchant Center - https://www.google.sk/retail/solutions/merchant-center
2. Then in the top right corner click the blue "Sign up for free" button.

To continue you have to press the blue button, which will redirect you to the next steps.
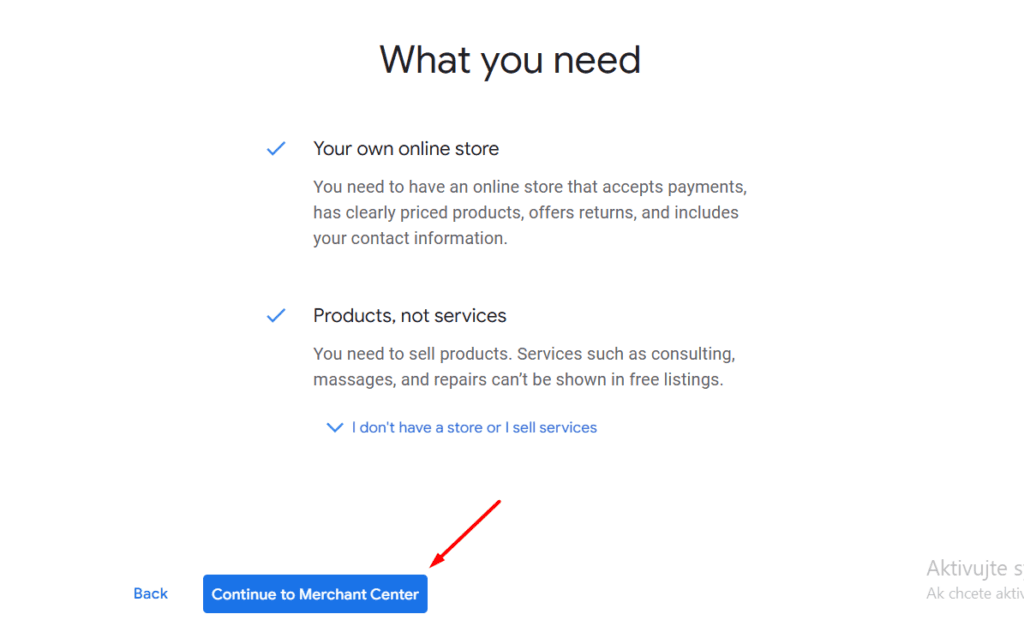
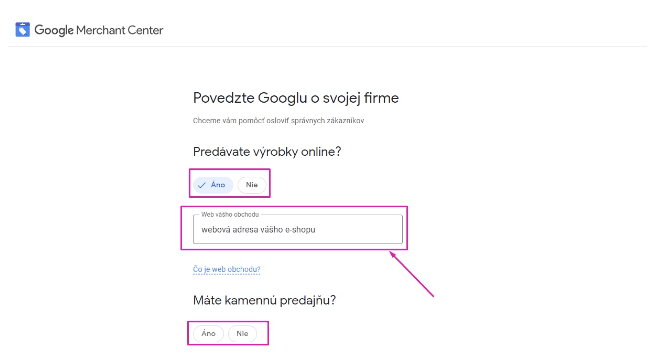
3. If you are logged in in your browser, it will automatically redirect you to the page where you enter basic information about your company. Otherwise you have to fill in your login details.
Google will then ask you two questions you need to answer:
To verify Google Merchant Center you have to carry out several steps, without which advertising products will not be possible. We will go through them all one by one.
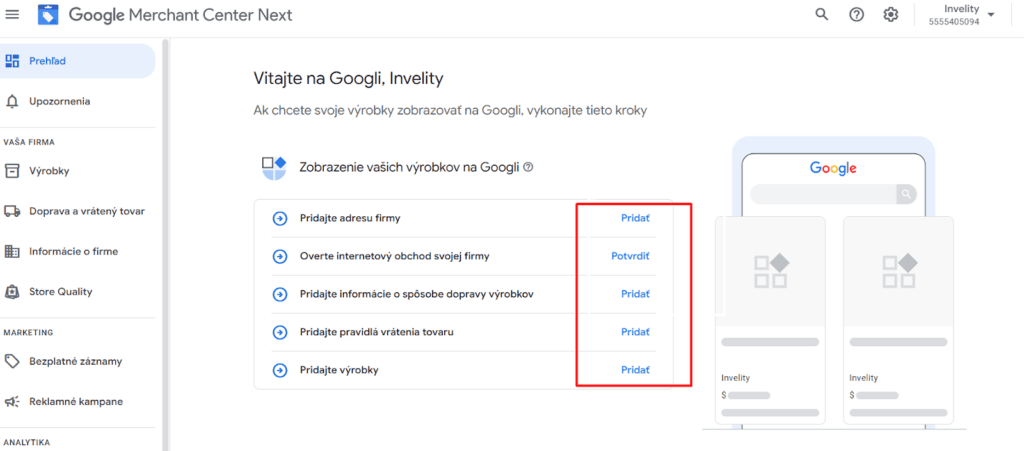
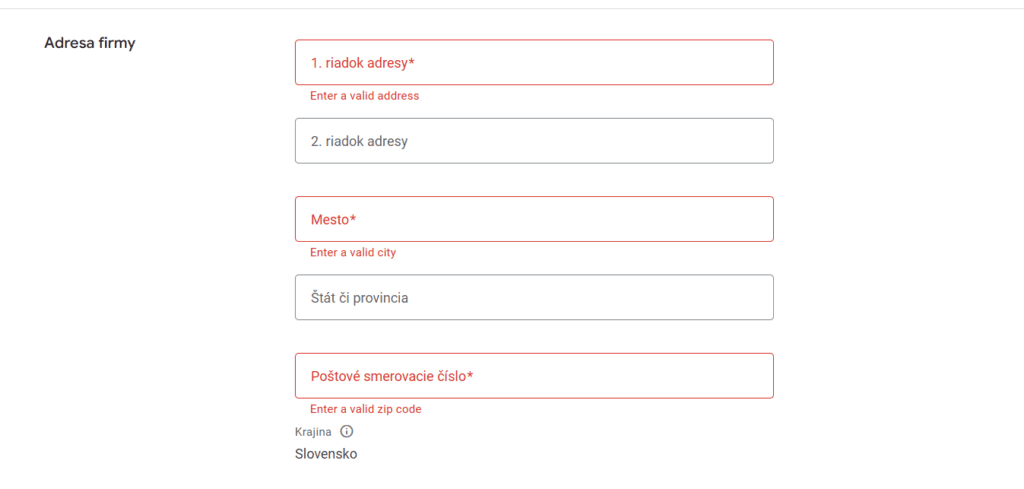
First you have to enter accurate information about your company, such as the name, address and the country where you do business. This data matters for your account working properly and for verifying the e-shop.
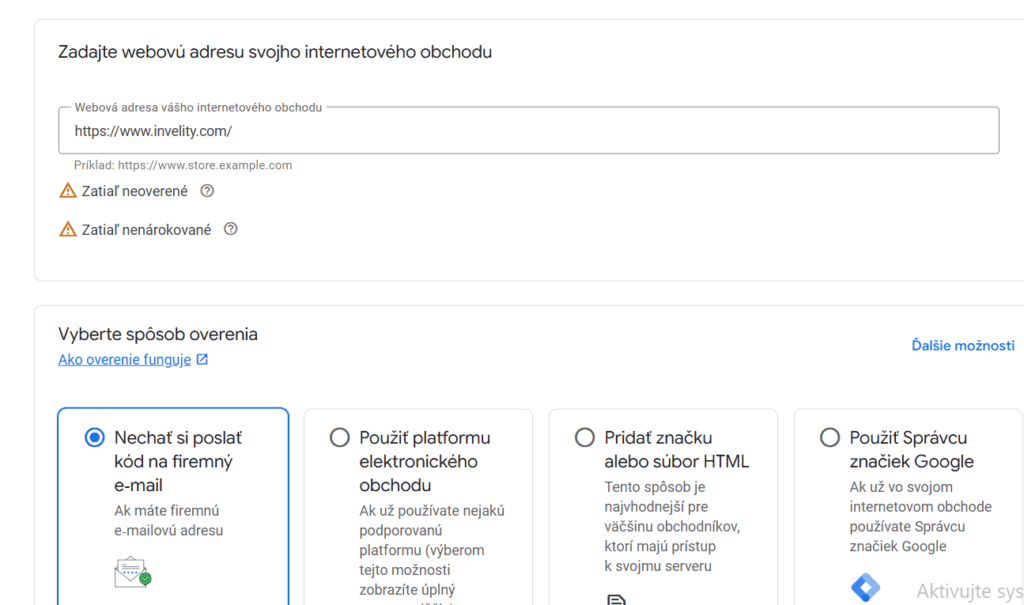
Connect your e-shop with Merchant Center. Google has to verify that you are the site's genuine owner. You have several verification methods to choose from and can pick the one that suits you best.
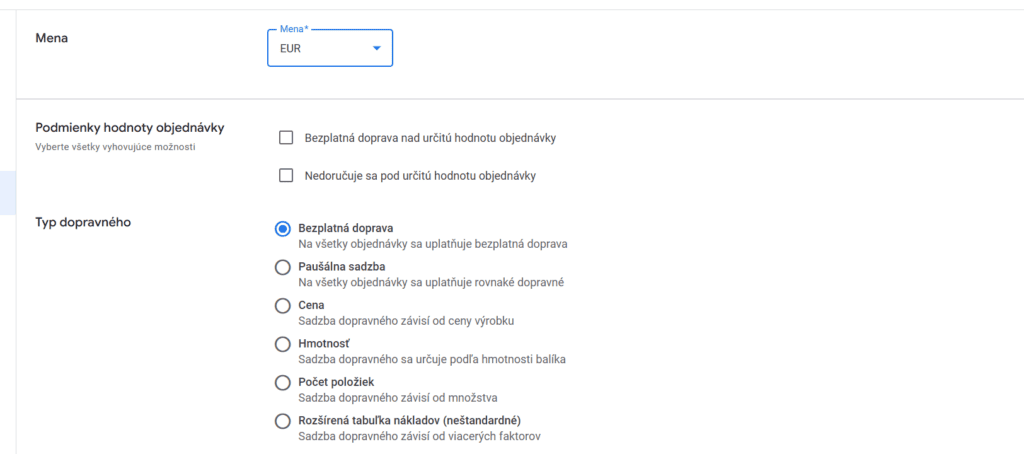
The next step is entering details about delivery options - prices, delivery times and the countries you ship to. Transparent delivery raises customers' trust.



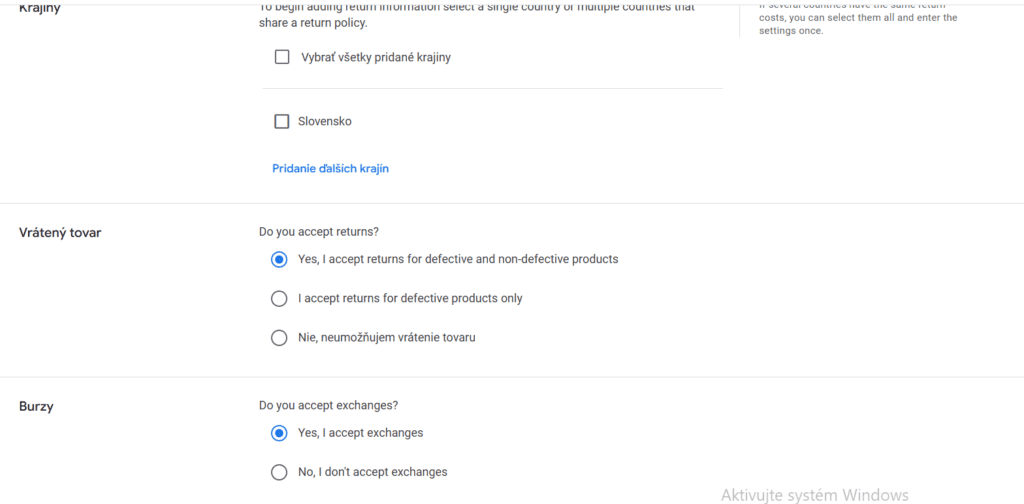
Define the rules for returning goods. State how many days the customer has to return a product and what the conditions are. Google will show this information in ads.

This step in Google Merchant Center is the final step for verifying your e-shop and uploading products.
Choose how you will add products:

Once the account is created, all that remains is giving your agency access to Google Merchant Center. The procedure is very simple and we will describe it in the following steps:
1. Get to your Merchant Center's main page. In the top bar click the cog.
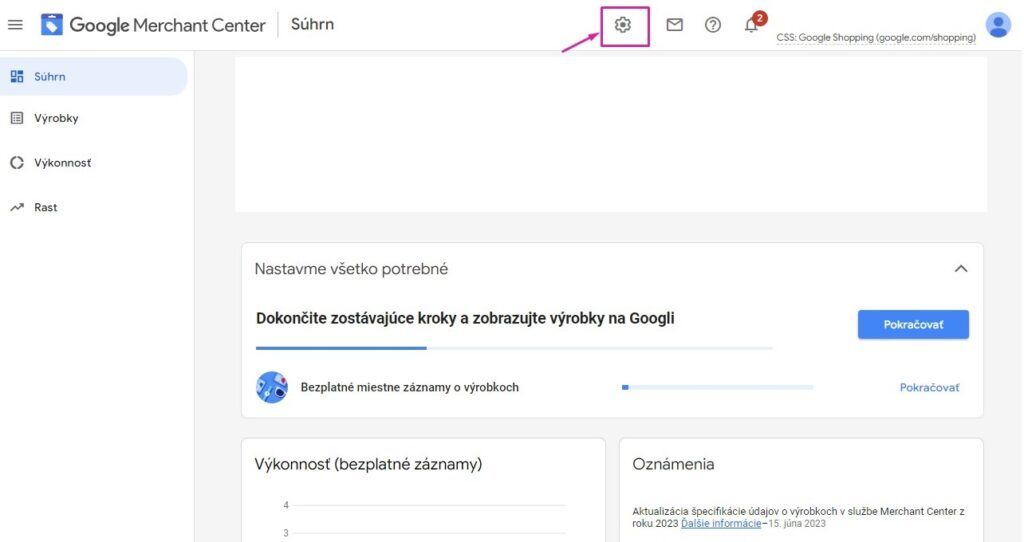
2. Then you have to press "People and access", which will redirect you to the interface for filling in the details needed.

3. Click the "Add person" icon in the People section.

4. Enter your agency's email address (in our case that is analytics@invelity.com) and click "Add user". After that it is up to the agency to accept your invitation.

In this guide we have gone through how to proceed when setting up Google Merchant Center and how to share access with an agency. We firmly believe creating a Merchant Center will be that bit simpler for you. Should you have any questions or problems, do not hesitate to get in touch — we will be glad to help.

Valéria Lapínová
PPC & SEO specialist
The latest trends, proven practices and analyses from the digital world. Find out how to take your technology and marketing growth further.
And don't forget to check out Invelity Extras – you'll find a marketing glossary, useful tools and plugins to make your work easier!
Invelity Extras


